Finding placeholder footage is one of those tasks that quietly eats your edit. You leave your timeline, open a stock site, search, download, dig the file out of your downloads folder, then import it before it ever touches your sequence. Do that a few times for one client cut and the afternoon is gone. Sourcer collapses that detour into one panel.
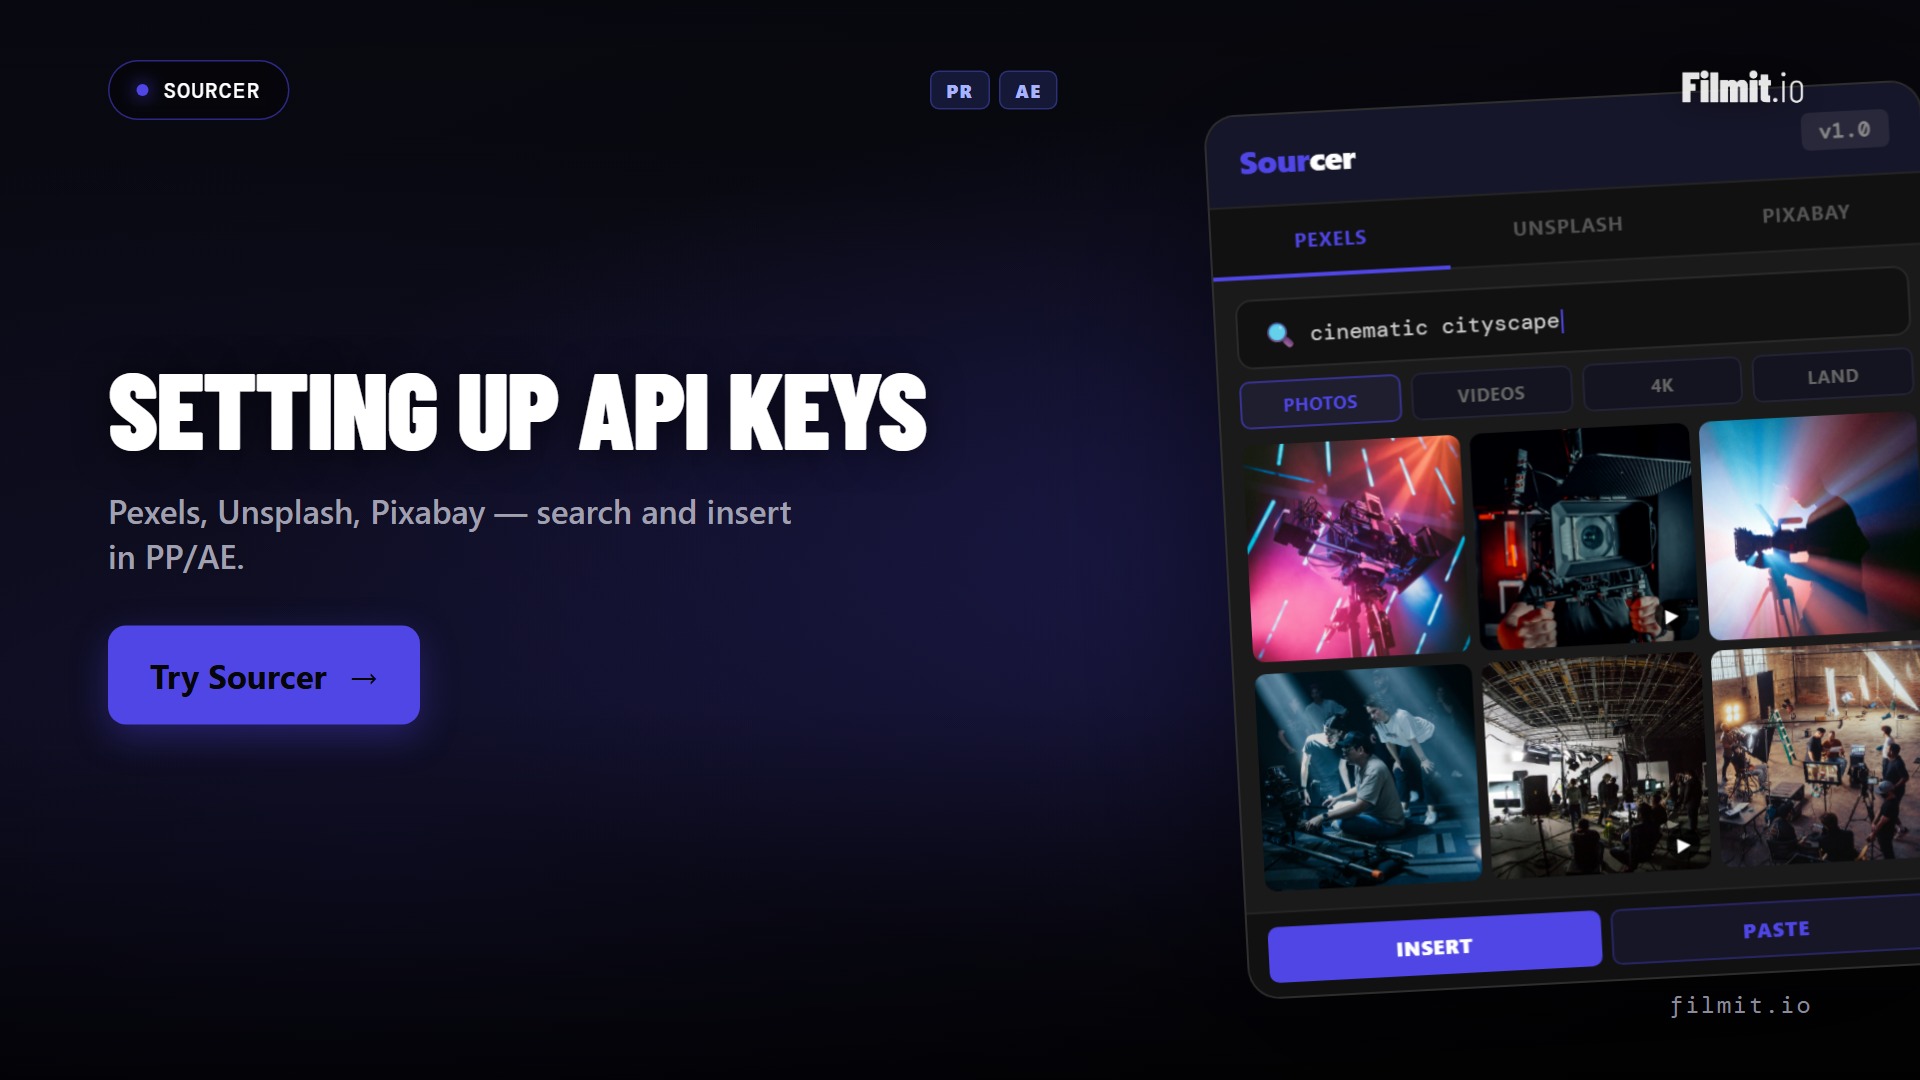
Sourcer is a Filmit plugin for After Effects and Premiere Pro that searches Pexels, Unsplash, and Pixabay and inserts royalty free footage and images straight onto your timeline. This guide walks through installing it, setting up your free API keys, and the flow of searching, inserting clips, and crediting creators. Support for DaVinci Resolve and Final Cut Pro is on the way.
This video may reference an older version of Sourcer. Features and UI may have changed since recording.
What Sourcer does inside your editor
You can go to Pexels, Unsplash, or Pixabay and download their footage for free in a browser. Sourcer is not a paywall around that media. It is a speed layer that brings all three libraries into one panel inside your editor. Type a query and you get images and videos in a visual grid. Click a result and it lands in your project: a dedicated Sourcer bin in Premiere Pro, or your active composition in After Effects. Every result is credited and royalty free.
Pro Tip: Reach for Sourcer when you need quick example footage to block out a sequence, not finished premium stock. Pulling a rough clip in seconds lets you keep cutting and swap in the final shot.
How to install Sourcer from Filmit Studio
Sourcer installs through Filmit Studio, the free companion app for Windows and macOS that manages every Filmit plugin from one place. The setup is the same whether you edit in After Effects, Premiere Pro, or both.
- Create a free account on filmit.io and open your dashboard.
- Download Filmit Studio for Windows or macOS and install it.
- Open Filmit Studio, go to My Tools, and click install on the Sourcer card.
- Open After Effects or Premiere Pro and find Sourcer under the Window menu, in Extensions.
One install covers both apps. Right after installing, Sourcer opens empty until you add your API keys, since the panel only loads media once a key is in place. If anything goes sideways, the settings panel has a support link and a Discord invite where you can talk to me directly.
How to set up your Pexels, Unsplash, and Pixabay API keys
Sourcer pulls footage from three sources, and each uses its own free API key tied to your account. You create them once and Sourcer uses them for every search. The same keys also power GIFer. The settings panel has a field for each, with instructions linking to the right page.
- Visit pexels.com forward slash api, get started, and follow the on screen steps to generate your key.
- Open the Unsplash for developers page, create an application, and copy the API key it generates.
- Register a free Pixabay account, work through its developer page, and create your key.
Once you have all three, paste each key into your Filmit dashboard under API Keys, or into the API Keys section inside Filmit Studio. The keys sync between the website and the app, so wherever you paste them the other side picks them up. A walkthrough sits at the bottom of filmit.io.
Pro Tip: Treat your API keys like passwords and never show them on screen. Paste them once into Filmit and they are stored against your account, so you never expose them again.
How to search three libraries and insert clips
With your keys in place, Sourcer loads images and videos the moment it opens. Switch between Pexels, Unsplash, and Pixabay to search each library side by side. Comparing three sources at once is the point: sometimes the shot you need is on only one.
Inserting works a little differently per editor. In Premiere Pro, insert performs a true insert edit and cuts the clip into your sequence at the playhead, while paste drops it on the track above to overlay your footage. Activate that track first so each paste stacks cleanly. In After Effects, Sourcer layers the clip into your active composition, so make sure a composition is open before you click.
Every clip arrives credited. Click the credit icon to see who created it, which makes shout outs effortless. Read each source license page before you publish so you know how a clip can be used.
Pro Tip: In After Effects, activate your composition before inserting or the clip has nowhere to land. In Premiere Pro, select the track above your footage first so each paste stacks correctly.
Where your sourced clips save
Sourcer lets you decide where downloaded media lands rather than dumping it into a default folder. In settings you can set the download directory separately for images, videos, and music, so assets follow your project structure. Here is how the three libraries compare:
For most edits, searching all three from inside Sourcer is the fastest path to a clip on your timeline.
Grid your sourced footage with GridMaker
Once you have pulled a handful of clips into After Effects, GridMaker, another Filmit plugin, turns them into a layout in one click. Run a four by four grid and the clips arrange into a video wall, images static and videos playing in place.
- Block out fast, refine later. Fill a sequence with example footage, then swap in final shots without re cutting timing.
- Compare before you commit. Search the same query across all three libraries to pick the strongest clip.
- Credit as you go. Note each creator from the credit icon so attributions are ready before you publish.
- Keep assets tidy. Point the download directory at your project folder so media stays with the edit.
Pro Tip: Pull four or five short videos with Sourcer, run a grid in GridMaker, and you have a polished video wall opener without hand placing a single layer.
Key takeaways
Sourcer turns finding stock footage from a multi step detour into a single panel inside your editor, in both After Effects and Premiere Pro.
One Filmit Studio install adds Sourcer to both After Effects and Premiere Pro.
Paste free Pexels, Unsplash, and Pixabay keys into Filmit once and they sync everywhere, GIFer included.
Compare Pexels, Unsplash, and Pixabay side by side to find the right clip faster.
Cut a clip into the sequence or overlay it on the track above, and layer freely in After Effects.
Every result shows its creator and you set where downloads save. Always check each source license.
Why a dedicated stock panel is worth it
I built Sourcer because I kept doing the same dance on every client edit: alt tab to a stock site, search, download, dig the file out of my downloads folder, import, then drag it onto the timeline. None of that is creative work. It is friction that pulls you out of the cut right when you have momentum.
Collapsing that into one panel does more than save clicks. It keeps you in flow. When pulling a clip is instant, you audition a few options instead of settling for the first download, and the edit gets stronger. There is even a small Easter egg in the demo: one Unsplash photo I insert is my own shot, a mangrove really taken in a Brooklyn botanical garden.
Take your editing workflow further with Filmit
Sourcer is one piece of a larger toolkit built to remove the repetitive parts of editing in After Effects and Premiere Pro. The Filmit for Editors suite covers stock sourcing, GIF insertion, gridding, project organization, and more, all through Filmit Studio.
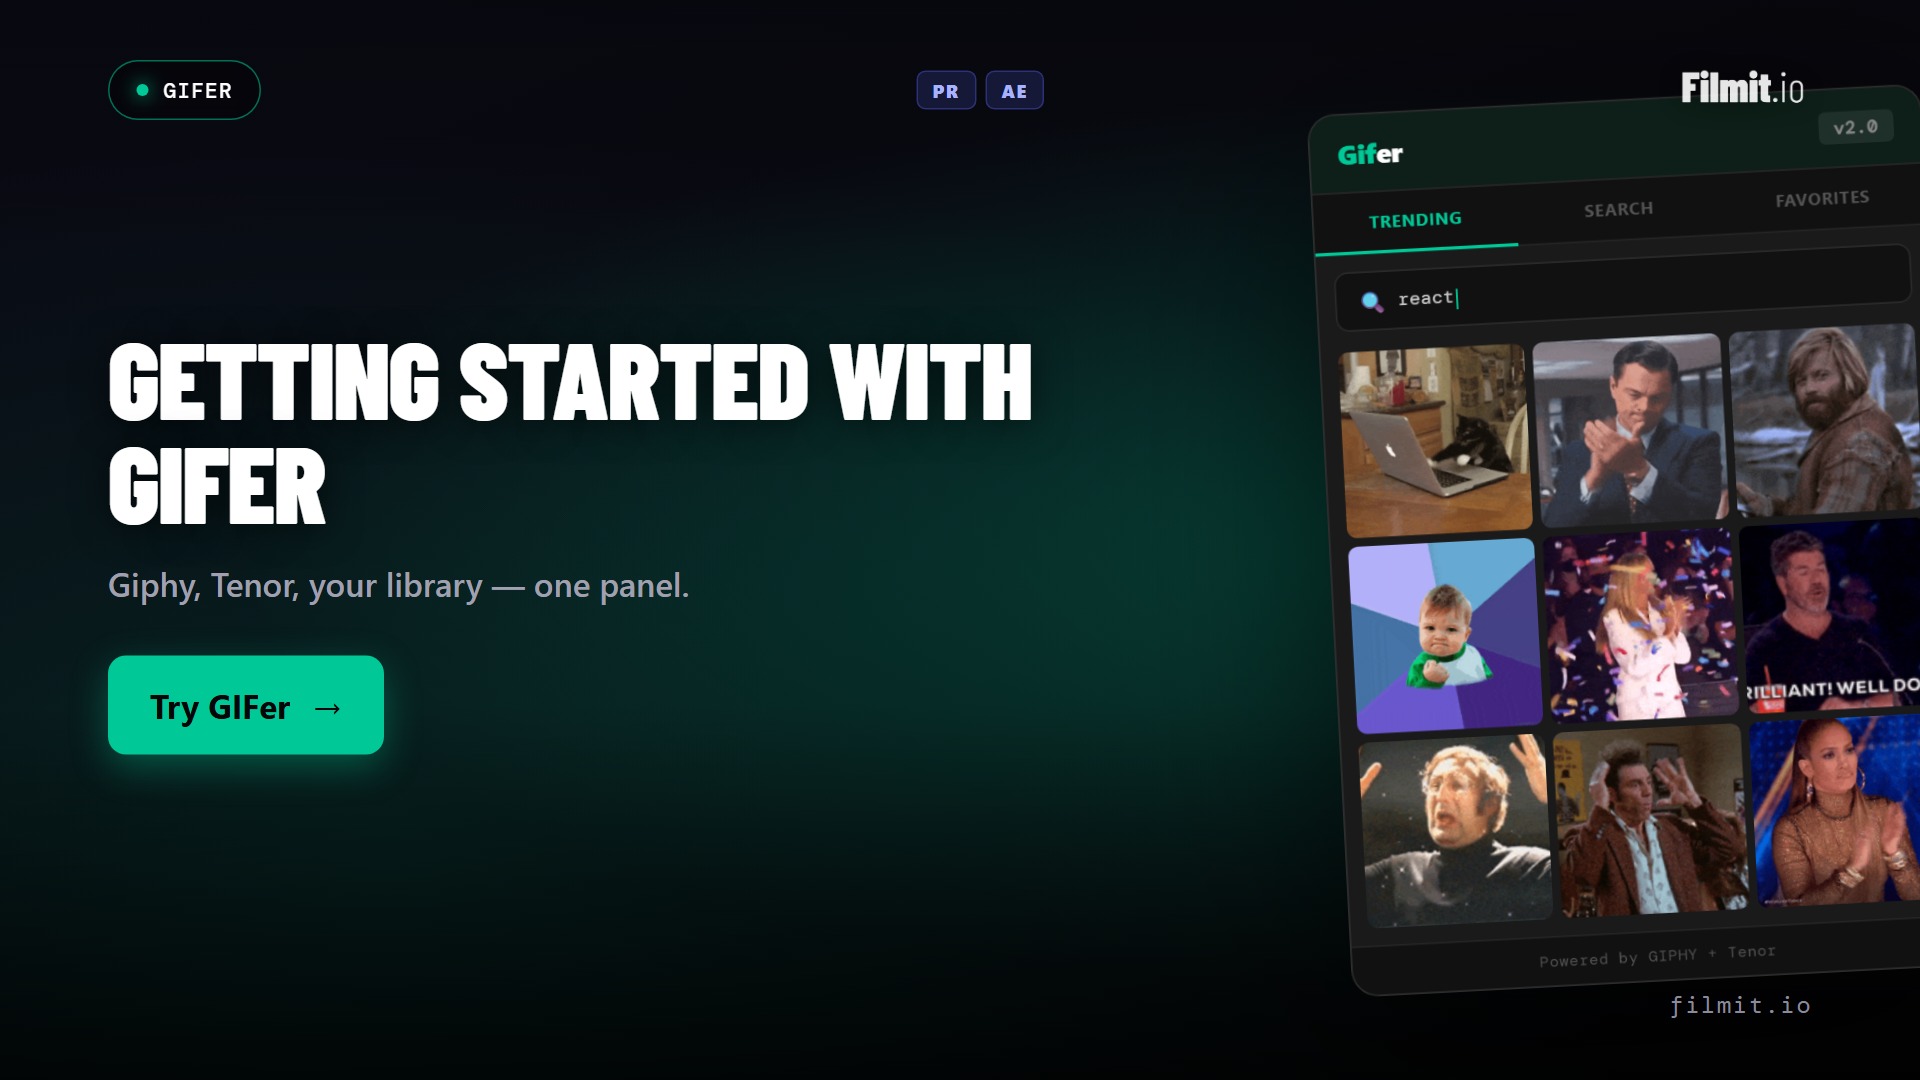
If you drop in a lot of reactions, GIFer searches Giphy and inserts GIFs onto your timeline using the same API setup. And when you want to arrange a stack of sourced clips, GridMaker builds split screens and video walls in one click. Every tool runs under one Filmit subscription.