Parenting layers in After Effects is the process of linking one or more child layers to a parent layer so that the child inherits the parent’s transform properties, including position, rotation, and scale. This is the standard industry mechanism for hierarchical animation control in Adobe After Effects, and understanding it separates editors who fight their timelines from those who move through them with confidence. The two primary tools for parenting layers are the pick whip (the spiral icon in the Parent & Link column) and the Parent dropdown menu. Null objects serve as invisible control layers that extend this system into full character rigs and complex motion graphics setups.
How do transform properties inherit in a parenting hierarchy?
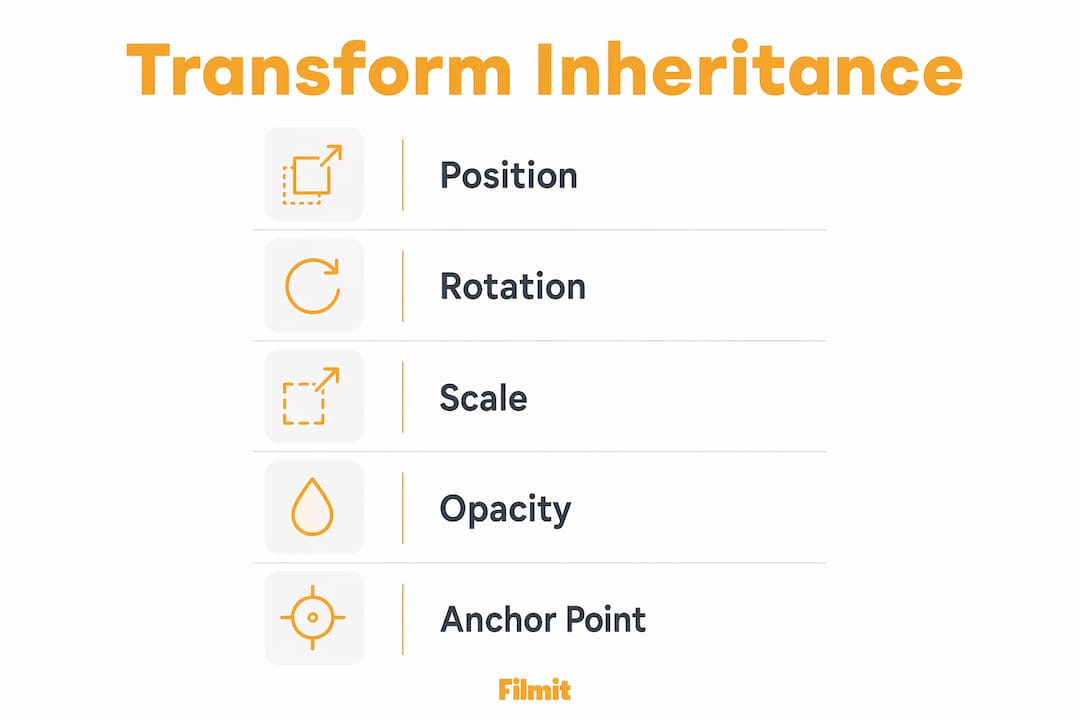
Transform inheritance works on a straightforward principle: a child layer’s position, rotation, and scale are calculated relative to the parent’s anchor point, not the composition’s origin. This means if you move the parent 200 pixels to the right, every child moves with it, even if you never touch their individual keyframes. That propagation flows downward through every level of the hierarchy.
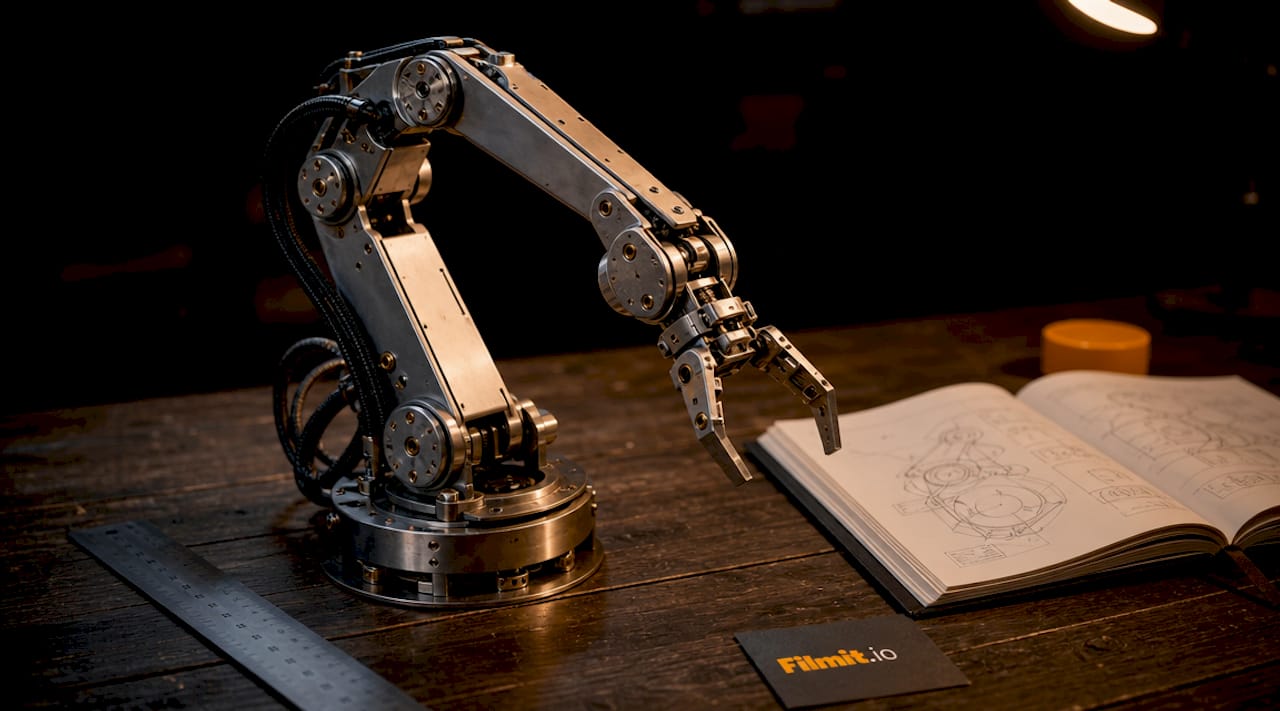
Multi-level parenting deepens this control. Imagine a robotic arm: the shoulder layer is the top-level parent, the forearm is a child of the shoulder, and the hand is a child of the forearm. Rotate the shoulder, and the entire arm follows. Rotate only the forearm, and the hand follows but the shoulder stays put. Motion flows strictly downward through the chain, never upward.
The anchor point is the rotation pivot for each layer in the hierarchy. Placing the anchor point at a joint, rather than the center of a shape, is what makes rotations look physically correct. A leg that rotates from its hip rather than its knee is the difference between natural motion and a broken puppet.
Child transforms are always relative to the parent. This affects how you read keyframe values. A child layer sitting at position (0, 0) does not mean it is at the top-left of the composition. It means it is exactly at the parent’s anchor point. Keep this in mind when you copy keyframes between projects or troubleshoot unexpected positions.
Yes
Child position adds to the parent's
Yes
Child rotation adds to the parent's
Yes
Child scale multiplies down the chain
No
Each layer keeps its own anchor
No
Parent opacity doesn't affect children
Pro Tip: Set your anchor point before you build a parenting chain. Moving an anchor point after children are attached can shift the entire rig in ways that are tedious to correct.
Does opacity inherit when you parent layers in After Effects?
Opacity is not inherited by default in After Effects parenting. A parent layer set to 0% opacity will disappear entirely while its children remain fully visible. This surprises nearly every editor the first time they encounter it, and it is one of the most common misconceptions in the After Effects parenting tutorial space.
This behavior is by design, not a bug. It gives you the freedom to use a null object as a parent controller without worrying that its visibility settings will bleed into the layers it controls. Nulls are already invisible at render time, but if opacity did inherit, any accidental opacity keyframe on a null would silently kill your entire rig.
Where this trips people up is in fade-in or fade-out animations. If you keyframe a parent layer’s opacity to fade from 100% to 0%, expecting all children to fade with it, nothing happens to those children. They stay at full opacity and float over a disappearing parent.
The workarounds depend on your goal:
- Pre-compose the group. Pre-composing bundles the layers into a nested composition where a single opacity keyframe on the pre-comp controls everything inside it.
- Expression-link the opacity. Add a one-line expression to each child layer's Opacity property —
thisComp.layer("ParentLayerName").transform.opacity— for a live link without pre-composing. - Use an adjustment layer. Place an adjustment layer above the group and keyframe its opacity. This works for fades but does not respect layer order in complex stacks.
Plan for opacity behavior explicitly. Expecting it to cascade down a parenting chain is the single most common parenting mistake — and the easiest to design around once you know it doesn't.
Pre-composing is the cleanest solution when you need unified opacity control, but it costs you direct timeline access to individual layers. Parenting keeps everything in the open. Choose based on how much you need to tweak individual layers after the fact.
How to use null objects as parenting controllers
Null objects are transparent layers that do not render in the final output. They exist purely as control points, and they are the backbone of any serious After Effects rig. Animating one null can drive dozens of layers simultaneously, which is far more efficient than keyframing each layer independently.
Here is a practical workflow for building a null-based rig:
- Create a null object via Layer > New > Null Object.
- Position the null at the logical control point for the group, such as the center of a character’s torso or the pivot of a shape system.
- Select all the layers you want to control, then use the pick whip on each to link them to the null.
- Animate only the null. Every linked layer follows without a single additional keyframe.
For character animation, the face rig technique is a clean example of this in practice. Create a Face null, parent the eye layers and mouth layers to it, then parent the Face null to the character’s main body layer. Now you can animate the face as a unit, the head as a unit, and the body as a unit, all from three null objects instead of managing every element separately.
Null objects also solve motion tracking stabilization. After you track a moving object in After Effects, you can apply the tracking data to a null and then parent your graphics to that null. The graphics lock to the tracked motion without any manual keyframing.
Pro Tip: Name every null descriptively, such as “CTRL_Head” or “CTRL_LeftArm,” and set them as Guide Layers (Layer > Guide Layer) so they appear in a distinct color in the timeline. This keeps your viewport clean and makes the rig readable at a glance.
For puppet pin setups, you can create a null at each pin’s position and link via expressions using .toComp offsets to stabilize pin positions in world space. This prevents the erratic drift that happens when puppet pins interact with parented layers.
How do you fix parenting snapping and switch parents mid-animation?
The most disorienting parenting problem is the snap. When you remove a parent link from a layer, the layer’s position values stay the same but the coordinate system changes. A layer that was at position (50, 50) relative to its parent suddenly interprets those values relative to the composition origin, and it jumps across the screen.
Native After Effects doesn't have a clean one-key fix for this. When you unparent, the layer keeps its parent-relative transform values, so it can land somewhere you didn't expect; the practical workaround is to note the layer's on-screen position and re-enter it after removing the link, or run a script built for the job. The harder case — switching a layer's parent partway through an animation — has no native answer at all, because there's no keyframeable parent property.
Common parenting issues and their solutions:
- Layer snaps on unparent. The layer keeps its parent-relative values — note its on-screen position before unparenting and re-set it, or use a script or plugin made for clean unparenting.
- Child rotates from the wrong pivot. Reposition the parent’s anchor point to the correct joint before building the hierarchy.
- Scale distorts unexpectedly. Check if a parent layer has non-uniform scale. Children inherit scale multiplication, so a parent at 50% width and 100% height will squash all children.
- Keyframes look wrong after reparenting. Child keyframe values are relative to the parent. Reparenting changes the coordinate reference, so existing keyframes will produce different results.
For switching a layer’s parent at a specific frame, After Effects has no native keyframeable parent property. The Good Parents plugin solves this directly. It adds keyframeable parent assignments with enable toggles, so you can switch a layer from one parent to another at a precise frame without any snapping or manual transform baking. This is the right tool for complex character animation where a hand needs to grab an object and the object must then follow the hand.
Pro Tip: Lock in your parenting hierarchy before you add animation keyframes. Restructuring a rig after keyframes exist is possible but slow. Build the skeleton first, then animate.
Parenting vs. pre-composing: which one should you use?
Parenting and pre-composing solve different problems, and the best projects use both deliberately. Parenting creates spatial and hierarchical dependency between layers while keeping every layer directly accessible in the main timeline. Pre-composing nests layers into a new composition, which organizes the timeline but hides individual layers behind a pre-comp boundary.
All layers visible in the main timeline
Must enter the pre-comp to edit layers
Independent per layer; no inheritance
One opacity on the pre-comp controls all
Apply per layer
One effect on the pre-comp hits the group
Hierarchical transform inheritance
Transforms apply to the pre-comp as a unit
Rigs, character animation, tracking
Timeline cleanup, global effects, reuse
The practical rule is this: use parenting when you need to animate relationships between layers over time. Use pre-composing when you need to apply a single effect or opacity to a group, or when your timeline is cluttered enough to slow down your thinking. For a well-organized After Effects project, combining both is standard practice. Parent your rig elements to nulls for animation control, then pre-compose finished sections to clean up the timeline for the next phase of work.
The opacity difference is the deciding factor in most cases. If your animation requires a group fade, pre-compose. If every layer in the group needs independent opacity control, keep them parented and handle opacity individually or via expressions.
Key takeaways
Layer parenting in After Effects is the most direct path to hierarchical animation control, and mastering it means understanding exactly which properties inherit and which do not.
Position, rotation, and scale flow down from parent to child.
A parent's opacity has no effect on its children — plan for it explicitly.
Parent layers to a null to animate them as one coordinated group.
Build the skeleton before you animate — restructuring later is slow.
Parenting for spatial rigs; pre-composing for unified effects and opacity.
Why most editors learn parenting backwards
Most After Effects tutorials teach parenting as a feature you bolt onto a finished animation. That's the wrong order. Parenting is architecture — you design it before you place a single keyframe, the same way a carpenter frames a house before hanging drywall.
The opacity misconception is the one that costs people the most time. Talking to motion designers, the same story comes up: an hour lost troubleshooting a fade that was never going to work, because they expected opacity to cascade down a parenting chain. It doesn't. Build your opacity strategy into the initial rig — pre-comp or expression links — and that entire category of problem disappears.
Null objects are the other turning point. Animating individual layers and then wondering why every adjustment takes forever is a rite of passage; a single well-named null at the top of a hierarchy means one set of keyframes controls a dozen layers. That's not a minor efficiency gain — it reshapes the whole editing session.
And the Good Parents plugin is worth knowing about, because native After Effects genuinely can't do keyframeable parent switching cleanly. If your work involves character animation or object hand-offs, a purpose-built tool pays for itself fast — don't try to fake it with expressions and manual transform baking when a dedicated option exists. Fix your hierarchy early, animate confidently, and the rig should feel invisible by the time you're in the creative part of the work.
Take your After Effects workflow further with Filmit
If parenting and layer organization are part of your daily After Effects work, Filmit builds tools that handle the mechanical parts so you can focus on the creative ones. Organizer auto-sorts and cleans your project panel, CallOuts builds animated callouts that track moving objects, EXpression drops in 38+ expression presets with no coding, and ProXimity creates distance-reactive motion without a single keyframe. Every plugin installs through Filmit Studio, the free companion app for Windows and macOS. Explore the full set for motion designers to see which fit your workflow.