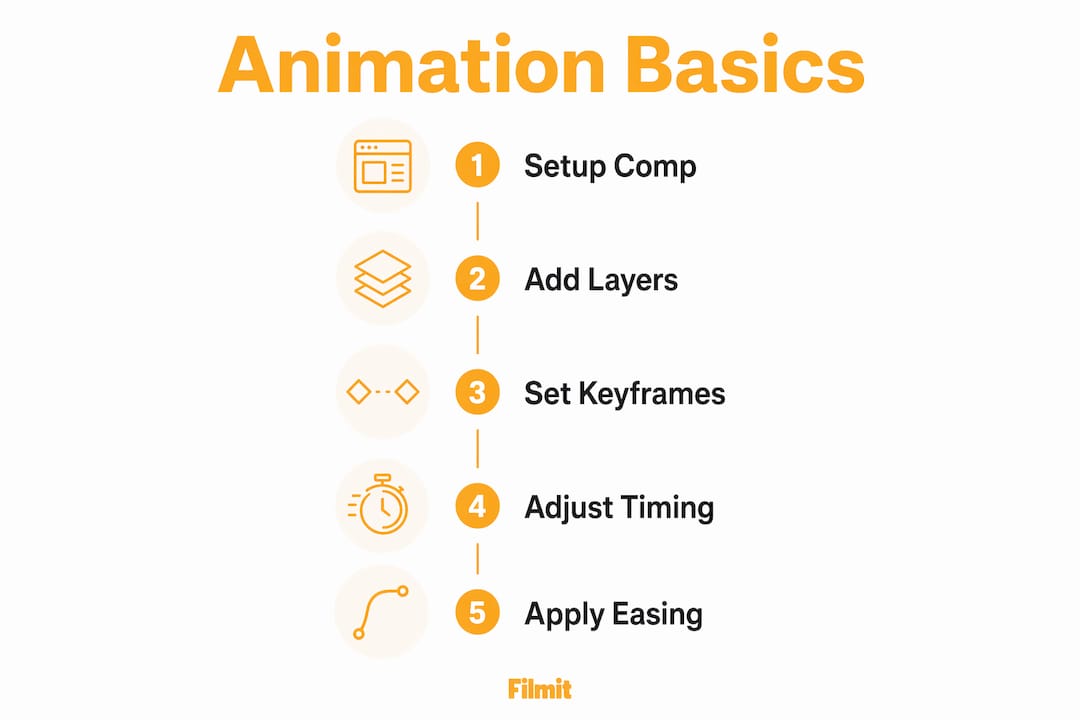
Adobe After Effects is the industry-standard application for motion graphics and visual effects, distinct from video editors like Premiere Pro. At $22.99 a month on the annual plan, it gives you a purpose-built environment for creating animated titles, lower thirds, and complex visual effects. To learn After Effects motion graphics basics, you need to understand five core concepts: compositions, layers, keyframes, easing, and the Graph Editor. Master those five, and you can build almost anything. This guide walks you through each one, shows you how to animate your first text element, and gives you a learning strategy that actually sticks.
What are the core concepts to learn first in After Effects motion graphics?
Motion graphics in After Effects is built on a layer-based system. Layers stack vertically like Photoshop, with the top layer appearing in front. This is the first mental shift you need to make if you are coming from Premiere Pro, which organizes clips on a horizontal timeline. In After Effects, you think in stacks, not sequences.
Compositions: your canvas
A composition (called a “comp”) is your workspace. It holds all your layers and defines the resolution, frame rate, and duration of your animation. Think of it like a stage. Everything you animate lives inside a comp. Compositions can also be nested inside other compositions, which lets you organize complex animations into clean, manageable pieces.

The five transform properties
Every layer in After Effects has five core transform properties. Focusing on these five produces results fast without overwhelming complexity:
- Anchor Point: the pivot around which a layer rotates or scales
- Position: where the layer sits in the frame
- Scale: how large or small the layer appears
- Rotation: the angle of the layer
- Opacity: how transparent or solid the layer is
Press P, S, R, T, or A on your keyboard to reveal each property individually. This shortcut alone saves you from digging through menus constantly.
Keyframes: the foundation of animation
A keyframe marks the value of a property at a specific point in time. You set a keyframe, move the playhead forward, change the value, and After Effects fills in the motion between. Keyframing works by interpolating the values you set, so the software calculates every frame in between automatically. That interpolation is where timing and spacing live, and timing is what separates stiff animation from fluid motion.
Pro Tip: Press U on any layer to reveal all keyframed properties at once. This is the fastest way to review what is animated on a layer without scrolling through every property.
How to create your first motion graphics animation in After Effects
Text animation is the best starting point for beginners. Animating simple text elements like lower thirds and titles teaches most of the core motion graphics concepts in a single project. Here is how to build your first one from scratch.
Create a new composition
Go to Composition > New Composition. Set the resolution to 1920x1080, the frame rate to 30 fps, and the duration to 5 seconds. That is the standard HD setup for most motion graphics work.
Add a text layer
Select the Type tool (Ctrl+T on Windows, Cmd+T on Mac), click in the comp, and type your title. Position it in the lower third of the frame for a classic lower-third layout.
Set your first keyframe
Press P to reveal the Position property. Move the playhead to frame 0 and click the stopwatch icon next to Position. That sets your first keyframe and tells After Effects to start tracking changes to this property.
Set your second keyframe
Move the playhead to frame 15 (half a second at 30 fps) and move the text layer into its final position. After Effects automatically places a second keyframe, and the motion between the two is now animated.
Apply Easy Ease
Select both keyframes and press F9. This applies Easy Ease, which simulates natural acceleration and deceleration and immediately makes the motion feel professional instead of mechanical.
Refine in the Graph Editor
Open the Graph Editor in the Timeline panel. You will see a curve representing the speed of your animation. Pull the handles so the motion eases in slowly and snaps into place. This is where professional motion designers spend most of their time.
Pro Tip: Hold Shift while dragging a layer in the comp to constrain movement to a straight horizontal or vertical path. Clean paths make lower thirds look polished.
Here is a quick reference for the most-used keyboard shortcuts in this workflow:
Reveal the Position property
Reveal Scale
Reveal Opacity
Apply Easy Ease to the selected keyframes
Open the Graph Editor
Preview your animation
What are common beginner mistakes in motion graphics animation?
The biggest mistake beginners make is leaving keyframes on their default linear interpolation. Linear motion looks robotic. Every object in the real world accelerates and decelerates. Easy Ease with F9 fixes this in one keystroke and is the single fastest upgrade to animation quality.
The second mistake is trying to learn everything at once. After Effects has hundreds of effects, expressions, and tools. Beginners who try to explore all of them in the first week end up lost. The interface is dense, and that density can make the whole program feel unapproachable. Resist the pull toward complexity early on.
There is a principle from classical animation worth internalizing early: animation is really just the placing of keyframes, and everything after that comes down to timing and spacing. Viewed through that lens, you have a framework that works no matter what you are animating.
The third mistake is skipping text animation and jumping straight to complex motion graphics. Text animation forces you to work with Position, Scale, Opacity, and easing all at once. It is the most efficient way to build muscle memory for the core workflow. Spend your first ten hours animating text before you touch shape layers or effects.
- Avoid linear keyframes on every project. F9 is your default.
- Ignore most of the interface for the first month. Focus on the five transform properties.
- Practice timing by counting frames, not seconds. Frame-level precision is what makes motion feel intentional.
- Study animations you admire by deconstructing motion graphics templates before building from scratch.
How do After Effects and Premiere Pro work together?
After Effects and Premiere Pro serve different roles. After Effects specializes in motion graphics and visual effects. Premiere Pro handles video editing and timeline assembly. The two programs connect through Adobe Dynamic Link, which lets you drop a live After Effects composition directly into a Premiere Pro timeline without rendering or exporting.
This workflow matters for editors who want to add animated titles or lower thirds to a video project. You build the animation in After Effects, link it to Premiere Pro, and any changes you make in After Effects update automatically in the Premiere timeline. No re-importing. No version confusion. The integration between After Effects and Premiere Pro is one of the strongest reasons to learn both tools together.
If you are still finding your feet in Premiere itself, our beginner's guide to Premiere Pro covers the interface, importing, cutting, and exporting from zero.
Here is how the two programs divide the work:
Yes
No
No
Yes
Yes
Limited
Limited
Yes (Lumetri)
Yes (via Dynamic Link)
Receives updates
Good project organization matters across both programs. Keep your After Effects project files in a dedicated folder inside your Premiere project structure. Name your comps clearly, such as “LowerThird_ClientName_v1,” so they are easy to identify in the Premiere timeline.
What are the best strategies to grow your After Effects skills?
The most effective learning strategy for After Effects is the hybrid approach. Start with templates and deconstruct them before you try to build from scratch. Open a professional template, look at how the keyframes are placed, study the easing curves, and then modify one element. This prevents the paralysis of staring at a blank project with no idea where to start.
Here is a practical progression for your first 90 days:
- Days 1 to 14: Master the five transform properties and basic keyframing. Animate text only. Build five lower thirds from scratch.
- Days 15 to 30: Download three free After Effects templates. Deconstruct each one. Change the text, colors, and timing. Do not add new elements yet.
- Days 31 to 60: Build a simple logo reveal from scratch. Use Position, Scale, and Opacity. Apply Easy Ease to every keyframe. Refine in the Graph Editor.
- Days 61 to 90: Learn shape layers and masks. Start exploring expressions like
wiggle()for organic motion. Build a 30-second motion graphics piece.
The role of keyframes in animation goes deeper than most beginners realize. Timing and spacing are skills borrowed from classical animation, and they apply directly to every motion graphics project you build. Study them deliberately, not as an afterthought.
Pro Tip: Use the After Effects workflow best practices of pre-composing related layers early. Group your text layers into a pre-comp before you start animating. It keeps your main timeline clean and makes revisions far less painful.
Understanding the difference between motion graphics and motion design also helps you grow faster. Motion graphics refers to the technical output: animated text, shapes, and graphics. Motion design is the broader discipline that includes creative direction, storytelling, and visual communication. Knowing the distinction helps you articulate your work and learn from the right resources.
Key takeaways
Mastering After Effects motion graphics basics requires five transform properties, consistent easing, and a hybrid learning strategy that combines template deconstruction with original project work.
Position, Scale, Rotation, Opacity, and Anchor Point cover most beginner animation needs.
Press F9 on every motion keyframe to replace robotic linear movement with natural-feeling animation.
Text animation teaches the core motion graphics workflow in a single focused project.
Deconstruct professional templates before building from scratch to accelerate skill development.
Use Dynamic Link to place live After Effects comps directly into Premiere timelines without exporting.
What actually makes After Effects click
The pattern we see with almost every editor who picks up After Effects is the same: the first week or two disappears into clicking through every panel, every effect, every preset, and building nothing. The interface feels like a cockpit with no manual. The people who get unstuck are the ones who force themselves to animate a single text layer for one full session, nothing else. By the end of that session, keyframes, easing, and the Graph Editor make more sense than they did after two weeks of wandering.
The uncomfortable truth is that After Effects rewards constraint. The more you limit yourself to a small set of tools, the faster you internalize them. The editors who chase expressions and particle systems in week one almost always stall out. The ones who spend a month on text animation almost always stick with it.
Easing matters more than most tutorials let on. Linear keyframes do not just look slightly off, they read as unfinished to anyone experienced. The moment you apply Easy Ease and spend five minutes in the Graph Editor shaping a curve, the animation crosses a threshold and starts to feel intentional. That shift is usually what keeps people motivated to keep building.
Starting with templates is not a shortcut, either. You learn more from one hour inside a well-built template than from three hours of passive tutorials. Open the keyframes, read the curves, ask why the designer made each choice, then change one thing and watch what it does to the rest.
Mostly, be patient with the initial learning curve. After Effects is genuinely complex, but the fundamentals are not. Nail those, and the rest of the program opens up on its own schedule.